POLYMER HARDNESS


INTRODUCTION
There are a number of different tests to measure the relative hardness of different materials. These tests are predominantly used as a measure for thermoplastic rubber types of plastic as a means of comparing softness and flexibility.
There are three main types of test – Rockwell, Ball and Shore Hardness. Results from Rockwell tests are not comparable with the other two as the former determines the hardness of plastics after allowing for elastic recovery of the specimen. Ball and Shore hardness measure the depth of penetration under load.
Shore A and D values can be compared to Ball indentation values.
ROCKWELL HARDNESS
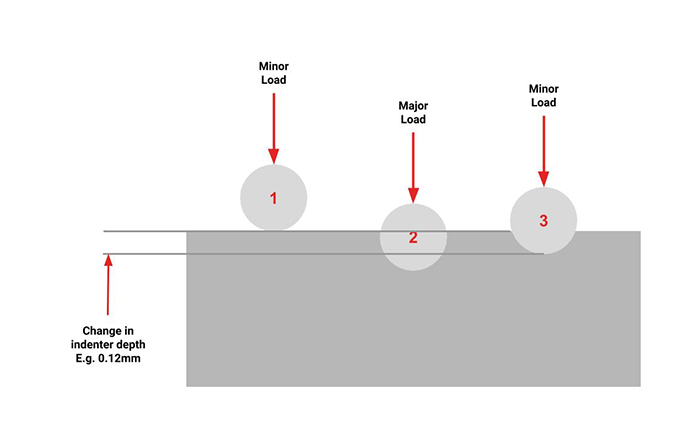
Rockwell hardness measures the indentation resistance of a material with higher numbers reflecting harder materials. A polished steel ball is forced into the surface of the test specimen using specified loads. An initial minor load is then increased to a major load and then back to the original minor load. Rockwell hardness is a measure of the net increase in depth of the indent. Hardness numbers should be between 50 and 115 with each number representing 0.002mm of penetration.
The calculations are as follows:
Hardness = 130 – (penetration/scale division)
Hardness = 130 – (0.12mm/0.002mm)
Hardness = 130 – 60 = 70

Loads and steel ball sizes vary dependent upon the hardness of the material:
| Scale | Minor Load (kg) | Major Load (kg) | Indentor Diameter (mm) |
|---|---|---|---|
| R | 10 | 60 | 12.7 |
| L | 10 | 60 | 6.35 |
| M | 10 | 100 | 6.35 |
| E | 10 | 100 | 3.175 |
| K | 10 | 150 | 3.175 |
The above test process is covered by ASTM D785. The similar standard is ISO 2039-2 which differs only in the respect of not having the K scale.
BALL HARDNESS (ISO 2039-1)
A 5mm diameter steel ball is pressed into a test specimen of at least 4mm thickness with an initial load of 9.8N increasing to a specified load for 30 seconds. The depth of the deformation is measured and surface area of the impression is then calculated. Hardness is expressed as the load in Newtons divided by the surface area of the indentation in mm2 – N/mm2=MPa.
Hardness values are shown with ‘H’ for hardness followed by the test load in Newtons and the test duration is seconds.
| Scale | Test Load (N) | Test Duration (Sec) |
|---|---|---|
| H 49/30 | 49 | 30 |
| H132/30 | 132 | 30 |
| H358/30 | 358 | 30 |
| H961/30 | 961 | 30 |

SHORE HARDNESS (DUROMETER HARDNESS)
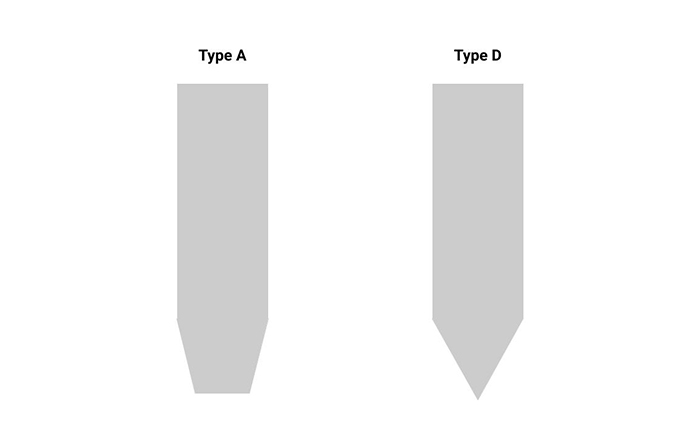
Shore hardness values are derived from measuring the indentation of a plastic material with a conical steel rod. A durometer with a calibrated spring is used – type A for softer materials and type D for harder ones. Values range from 0 (full penetration) to 100 (no penetration) with full penetration ranging from 2.46mm to 2.54mm depending on the equipment.
The test specimen is placed in the durometer and the pressure rod is applied for 15 seconds after which time the scale is read.
Both standards – ASTM D2240 and ISO 868 are identical.
