POLYMER SHRINKAGE
Mould shrinkage is defined as the difference between the dimensions of the mould and the moulded part. It is expressed either in millimetres per millimetre or, more commonly, as a percentage.
Usually a general shrinkage value is quoted. Alternatively, two figures may be given – parallel (in line of flow) and perpendicular to the flow (cross-flow). This is particularly important in the case of glass-filled materials, for example, as there can be a significant difference between the two figures.
Other factors affecting shrinkage include part design, mould design, mould temperature, injection pressure and cycle time.


ASTM D955
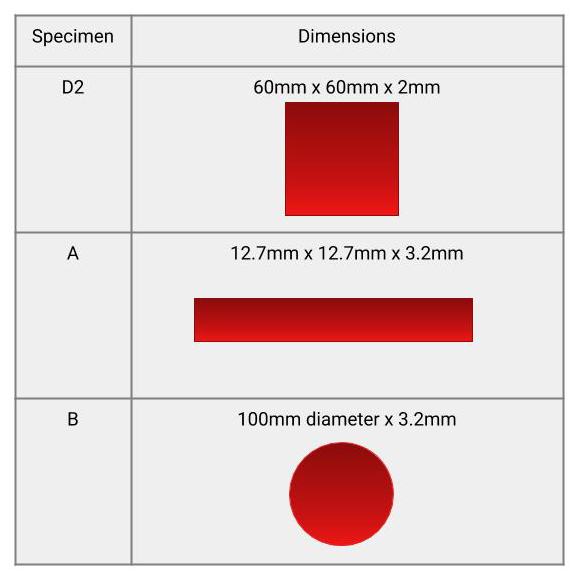
Three types of specimen may be measured (see below). Type A measures shrinkage in the flow direction only. The dimensions of the mould cavity are measured and then compared with the moulded specimen. The difference between the two as a proportion of the mould cavity size represents the shrinkage.
As testing is carried out on bars or discs the figures can only be a guide, so for mating parts or those with critical dimensions fine tuning may be required to the mould to achieve a suitable final part. It must also be borne in mind that a plastic moulding will continue to shrink long after it has been ejected from the mould. For this reason mould shrinkage figures are based on dimension changes 24 hours after the part has been moulded.
ISO 294-4
This standard uses the same size of plaque as ASTM D955 specimen D2.


